Licensed air conditioning in Hialeah.
Florida DBPR licences CAC1824292 and RA13067646.
Services
These are the services listed on wynwoodac.com, copied from the official site on November 13, 2026. No prices were published. Use the symptom selector or category filters below to match your equipment issue and inspect the technical scope for each service.
-

Complete removal and replacement of the split air-conditioning system, matching the outdoor condenser and indoor air handler to the building's cooling load, existing ductwork, and electrical supply.
- Common signs
- Frequent breakdowns, uneven room temperatures, corroded coils, or mismatched indoor/outdoor units
- Component
- Outdoor condenser + indoor air handler
- When needed
- When major components fail on an older unit or coil corrosion makes isolated repairs impractical
Technical scope & inspection steps
- Recover existing refrigerant safely and disconnect high-voltage and low-voltage wiring.
- Remove the old outdoor condenser and indoor air handler, inspecting the concrete pad, closet platform, and plenum transitions.
- Set and level the matched condenser and air handler, braze copper line-set connections, and install a new liquid-line filter drier.
- Pressure-test with dry nitrogen, pull a deep vacuum, release refrigerant charge to nameplate subcooling/superheat, and verify airflow and Delta-T.
Choose full system replacement when both coils show advanced fin corrosion, when a compressor failure occurs on an aging unit, or when mismatched indoor and outdoor sections prevent proper humidity removal.
-

Diagnosis and replacement of a failed hermetic or scroll compressor in the outdoor condensing unit, including refrigerant recovery, system flush after burnout, new filter drier, and vacuum evacuation.
- Common signs
- Outdoor breaker trips immediately, loud clunk or hum on startup, or fan spins while air stays warm
- Component
- Outdoor condenser vapor pump
- When needed
- When the compressor windings short to ground, seize mechanically, or lose internal pumping compression
Technical scope & inspection steps
- Test compressor windings with an ohmmeter/megohmmeter and verify start capacitor and contactor health first.
- Recover remaining refrigerant, unbraze the failed compressor, and test refrigerant oil for acid after electrical burnout.
- Install the replacement compressor, new liquid-line filter drier, and fresh contactor/run capacitor.
- Pressure-test brazed joints with nitrogen, evacuate to deep vacuum, and weigh in the proper refrigerant charge.
Always verify whether a bad capacitor or contactor is mimicking a locked compressor first. If the compressor itself has failed on a newer cabinet with clean coils, compressor replacement restores cooling; on an older unit, compare against full system replacement.
-

Precision refrigerant charging (listed as Freon charge on wynwoodac.com) calibrated by superheat, subcooling, and outdoor ambient temperature so the evaporator coil absorbs heat without freezing.
- Common signs
- Ice forming on copper suction line, lukewarm supply air, or long cooling cycles that never satisfy the thermostat
- Component
- Sealed refrigerant circuit & metering device
- When needed
- After a refrigerant leak repair, valve core replacement, or component service when system pressures are low
Technical scope & inspection steps
- Connect manifold gauges and temperature clamps on the suction and liquid service ports.
- Verify indoor airflow and coil cleanliness so airflow restrictions are not mistaken for low refrigerant.
- Measure target superheat (fixed orifice) or subcooling (TXV) against the equipment nameplate chart.
- Adjust refrigerant charge by scale and confirm supply-to-return temperature split across the indoor coil.
Refrigerant operates in a closed loop and is not consumed like fuel. If your system needs a charge, pairing the charge with leak search detection and repair prevents repeat loss.
-

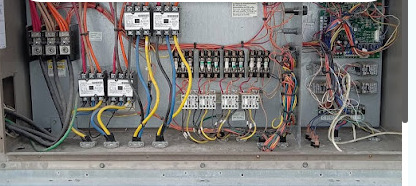
Inspection and replacement of the high-voltage magnetic contactor and dual/single run or start capacitors (listed as Contacter and capacitor replacement on wynwoodac.com) inside the condenser electrical panel.
- Common signs
- Clicking or buzzing outside, outdoor fan or compressor won't start, or swollen/leaking capacitor top
- Component
- Outdoor electrical control bay
- When needed
- When microfarad capacitance drops out of tolerance or contactor silver points pit, weld shut, or burn open
Technical scope & inspection steps
- Disconnect high-voltage power at the service disconnect and safely discharge stored capacitor voltage.
- Measure HERM and FAN microfarad (µF) readings under load/open test and inspect contactor contacts for carbon pitting or welded points.
- Install properly rated replacement capacitor(s) and 24V-coil contactor with tight spade and lug connections.
- Restore power, verify 24V control coil pull-in, and measure compressor and fan starting/running amperage.
Contactor and capacitor replacement is one of the most common, straightforward electrical repairs on an AC unit. Catching a weak capacitor early protects the compressor and condenser fan motor from overheating.
-

Mechanical and coil-safe chemical cleaning of the indoor evaporator coil and outdoor condenser coil to restore heat transfer, lower compressor head pressure, and clear airflow across the fins.
- Common signs
- Reduced cooling output, musty odor from vents, frosted indoor coil, or hot outdoor unit
- Component
- Indoor evaporator coil & outdoor condenser coil
- When needed
- When dust, biofilm, pet hair, or yard debris matted on aluminum fins blocks heat transfer and airflow
Technical scope & inspection steps
- Inspect indoor evaporator A-coil/slab coil and outdoor condenser fins for impacted dust, grease, or grass clippings.
- Apply non-acidic, fin-safe foaming coil cleaner and rinse carefully without bending delicate aluminum louvers.
- Combing of flattened fin sections where needed and flushing of residue into the condensate pan and drain.
- Reassemble access panels and verify static pressure drop and temperature split across the cleaned coil.
Even a thin mat of dust on an indoor evaporator coil acts like insulation, trapping cold inside the coil until it freezes while rooms stay warm. Cleaning restores capacity when tubing is intact.
-

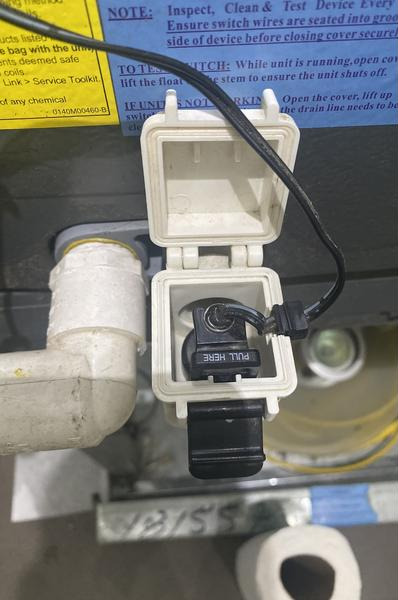
Clearing, flushing, and vacuuming of the primary and secondary condensate drain lines and drain pans, plus testing of the float safety switch to stop water backups and unexpected safety shutoffs.
- Common signs
- Water pooling around the indoor air handler, blank thermostat triggered by float switch, or dripping overflow pipe
- Component
- Condensate drain pan, PVC trap & float switch
- When needed
- When algae, slime, or sediment blocks the 3/4-inch PVC condensate drain or fills the drain pan
Technical scope & inspection steps
- Inspect the primary evaporator drain pan, auxiliary overflow pan, and float safety switch (see work photo 02a).
- Vacuum and pressure-flush the 3/4-inch PVC condensate line from the air handler through the P-trap to the exterior termination.
- Clean biological slime and sediment from the drain pan outlet port so water exits freely without standing puddles.
- Verify proper pitch, test the float switch cutoff circuit, and confirm steady condensate drainage during cooling.
In Hialeah's humid climate, an AC system removes gallons of moisture from indoor air every day. If the PVC drain clogs, the float switch shuts the whole AC off—or water overflows into closets and ceilings.
-

Removal and blade-by-blade cleaning of the indoor squirrel-cage blower wheel and housing so the fan moves its rated cubic feet per minute (CFM) quietly without vibration or motor strain.
- Common signs
- Weak air from vents even with a clean filter, humming or vibration from the air handler, or icing evaporator coil
- Component
- Indoor squirrel-cage blower assembly
- When needed
- When dust and microbial buildup fill the curved squirrel-cage blades so the wheel slips air instead of moving it
Technical scope & inspection steps
- Disconnect power, slide out the indoor blower housing assembly, and inspect the motor shaft, set screw, and balance weights.
- Wash and brush each curved blower blade to remove caked dust that flattens the blade scoop profile.
- Clean the interior scroll housing, re-center the wheel on the motor shaft, and torque the hub set screw.
- Test blower operation for smooth balance, quiet rotation, and restored register airflow.
Even 1/16 inch of compacted dust inside the curved blades of a squirrel-cage blower wheel can cut indoor airflow by 20% to 30%, starving the evaporator coil of air and overworking the blower motor.
-

Replacement of the indoor air-handler blower motor (multi-speed PSC or variable-speed/constant-torque ECM), including capacitor or module checks, wheel alignment, and airflow verification.
- Common signs
- No air coming from vents while outdoor unit runs, squealing bearings, burning electrical smell, or surging fan speed
- Component
- Indoor air-handler drive motor (PSC or ECM)
- When needed
- When indoor blower motor bearings seize, windings open/short, or an ECM control module fails
Technical scope & inspection steps
- Verify 24V fan relay/control board signal and line voltage at the motor before condemning the motor.
- Pull the blower assembly, release the squirrel-cage wheel from the shaft, and inspect the wheel and housing.
- Mount the matched replacement blower motor (and new run capacitor for PSC motors), align the wheel, and balance clearance.
- Set proper cooling/heating speed taps, verify amp draw against nameplate FLA, and test duct airflow.
If the outdoor condenser runs while the indoor blower motor is dead, liquid refrigerant cannot boil off in the evaporator coil—quickly freezing the indoor unit and risking liquid slugging to the compressor.
-

Replacement of the weather-sealed outdoor condenser fan motor and run capacitor, setting exact fan blade depth in the shroud so heat is pulled evenly across the outdoor coil.
- Common signs
- Outdoor fan blade not spinning while compressor hums, burning hot condenser top, or screeching outdoor noise
- Component
- Outdoor condenser top/side exhaust fan motor
- When needed
- When the outdoor fan motor seizes from heat/rain exposure, burns windings, or fails to cool the condenser coil
Technical scope & inspection steps
- Disconnect outdoor power and test whether the fan capacitor or contactor is the cause before removing the motor.
- Unbolt the condenser top grille, remove the aluminum fan blade from the seized shaft, and inspect the blade for cracks or warpage.
- Mount the matched horsepower/RPM weather-sealed condenser fan motor, set proper blade insertion depth in the orifice ring, and wire to a fresh capacitor.
- Verify upward/outward airflow direction, measure motor amperage, and confirm compressor head pressures drop back to normal.
Without the outdoor fan pulling air across the condenser coil, refrigerant pressure spikes within seconds and the compressor overheats. Replacing a failed condenser fan motor protects the compressor.
-

Pinpointing refrigerant leaks across the indoor evaporator coil, outdoor condenser, copper line-set, and service valves using electronic detection, nitrogen pressure testing, and micro-bubble solutions, followed by targeted repair.
- Common signs
- System loses cooling again after a previous refrigerant charge, oily residue on fittings, or frozen suction pipe
- Component
- Evaporator, condenser, copper line-set & valves
- When needed
- Whenever refrigerant pressure drops below spec or before recharging a low system
Technical scope & inspection steps
- Inspect accessible copper fittings, Schrader valve cores, distributor tubes, and coil U-bends for refrigerant oil traces.
- Scan the indoor air handler, line-set, and outdoor condenser with a heated-diode or infrared electronic refrigerant leak detector.
- Isolate and pressurize suspect sections with dry nitrogen and pinpoint the exact leak site with micro-bubble solution.
- Braze copper joints, replace leaking valve cores or fittings, pull a deep micron vacuum, and recharge to factory spec.
Brazed copper joints, rub-outs on copper lines, and leaking Schrader service valves are repairable. If the leak is widespread formicary corrosion across thin aluminum evaporator fins, coil or system replacement is more reliable than patching.
-

Diagnostic adjustment and service of the air-conditioning system's latent moisture removal—checking fan mode, blower CFM per ton, coil cleanliness, drain pan runoff, and thermostat cycle tuning for Hialeah's humid climate.
- Common signs
- Indoor air feels clammy or sticky even at 72°F, condensation on windows/vents, or musty closet smell
- Component
- Airflow speed, evaporator latent removal & controls
- When needed
- When short-cycling, incorrect fan settings, dirty coils, or standing drain water prevent proper moisture removal
Technical scope & inspection steps
- Measure indoor relative humidity alongside return and supply dry-bulb/wet-bulb temperatures.
- Verify thermostat fan setting (AUTO vs. ON) and adjust air-handler blower speed taps so air stays on the cold coil long enough to condense moisture.
- Inspect the evaporator coil and primary drain pan to ensure condensed water drains out immediately instead of re-evaporating.
- Check refrigerant charge and cycle run-times so the system does not short-cycle before removing latent humidity.
Many indoor humidity complaints in South Florida are solved without replacing the unit—simply fixing a fan set to continuous ON, slowing an oversized blower speed tap, or clearing a slow drain pan makes a major difference.
-

Testing of the 24-volt control circuit and replacement of the wall thermostat (listed as thermostat replacement on wynwoodac.com), configuring system type (straight cool vs. heat pump), C-wire power, and compressor short-cycle protection.
- Common signs
- Blank thermostat screen, room temperature doesn't match display, short-cycling, or fan/cool relays not responding
- Component
- 24V wall thermostat & control wiring
- When needed
- When the wall thermostat loses calibration, drops 24V relay outputs, or needs upgrading for reliable control
Technical scope & inspection steps
- Test 24V AC transformer voltage between R and C at the wall subbase and verify float switch continuity before replacing the thermostat.
- Label and inspect low-voltage control wires (R, C, Y, G, W / O-B) for nicked insulation or loose splices.
- Mount the replacement thermostat level on the wall, configure equipment staging (heat pump reversing valve vs. electric strip heat), and enable compressor delay protection.
- Test cooling call (Y + G), fan control, and temperature calibration.
Before replacing a blank thermostat, always check the air-handler drain float switch and the 3-amp/5-amp low-voltage fuse on the control board—both cut 24V power to the thermostat when tripped.
How to decide: targeted component repair vs. full replacement
Use this quick reference before calling (786) 303-3739 so you know what to describe on the phone.
Best when the compressor and motors run properly, but airflow is weak, the PVC drain tripped the float switch, or indoor humidity feels high. Covers Coil cleaning, Cleaning of drain lines and drain pans, Blower wheel cleaning, and Humidity control.
Best when an isolated part fails on an otherwise sound cabinet—such as a swollen run capacitor, pitted contactor, seized fan motor, faulty thermostat, or repairable copper leak. Covers Contacter and capacitor replacement, Blower motor replacement, Condenser fan motor replacement, Leak search detection and repair, Freon charge, and thermostat replacement.
Best when the compressor grounds out or locks mechanically, when coils have widespread corrosion leaks, or when indoor and outdoor units are mismatched. Covers Compressor Replacement and Full system replacement.
Work photos
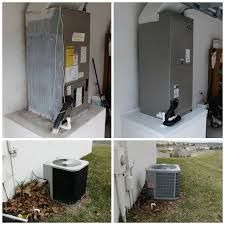
Wynwood Air Conditioning
Wynwood Air Conditioning LLC is an air-conditioning contractor in Hialeah. The primary address, on Google Maps, Florida DBPR, and Sunbiz, is 277 W 26th St, Hialeah, FL 33010. Florida DBPR licences CAC1824292 and RA13067646. Call (786) 303-3739.
Visit
Florida DBPR licences CAC1824292 and RA13067646.
Wynwood Air Conditioning on Google Maps
Request a quote
Call (786) 303-3739
Licensed air conditioning in Hialeah, at 277 W 26th Street.
Florida DBPR licences CAC1824292 and RA13067646.